Friday, 5 October 2012

A Belgian. (And a little bit about IMBC.)

I’m going to come right out and say it – “the best beer in England” isn’t saying much now is it. It’s a bit like “the best chocolate in the Netherlands”
That quote is from a Belgian colleague of mine at work (the context being that she was looking for Duvel Tripel Hop in England, and the place I suggested not only sells it but also 'some of the best beers in England').

It's hard to know how to respond to someone saying something like that - it's hard to know how much they know of beer in this country beyond the most visible brands, although, generally speaking, the higher the profile, the worse the beer. It's also possible that they've drunk quite a bit of English beer and they're singularly unimpressed by it all - or gave up after endless disappointments.

In any case, so far I haven't actually said anything to challenge what they've said. To make a massive generalisation about generalisations, I think a lot of people don't want to have their assumptions about things challenged. Belgians make great beers of many varieties. American beer is yellow, 'lite' and pissy. English beer is warm, brown and flat. Bears go in the woods. Why try to challenge what we already know?

(What I wish I could do would be to take them to the Independent Manchester Beer Convention which kicked off today and concludes tomorrow (which is when I'm going up). The venue looks fantastic (a former swimming baths, with bars in the pool), and the list of beers on offer is truly superb (and, dare I say, slightly more interesting than the vast majority of British beers on offer at the GBBF this year - I'm definitely not getting into whether this has anything to do with the diversity of dispense methods). I'm especially looking forward to seeing what The Wild Beer Co are bringing, if only because I'm tired of hearing from other people how great their prototypes are.)

A question to end with - if you had to change my colleague's mind, what would you serve them? I was thinking of the Kernel's Citra IPA (seeing as they like this year's Tripel Hop) or perhaps Magic Rock's Clown Juice for something with a Belgian twist. And maybe I could find something from a specialist Dutch chocolatier to go with it?


Monday, 1 October 2012

All-Grain Brew #4 - 'Jessica Porter'

If you know someone whose surname is 'Porter' and you like to brew, then I imagine that it's fairly inevitable that you will end up brewing something dark for them at some stage. My friend Jessica recently gave up her beery name when she got married to my long-time drinking partner Adam, but before he could strip her of her birthright, I brewed them a chocolately imperial porter.

Back in March, when I wasn't sure what to brew for my 4th all-grain brew, I canvassed on Twitter and someone suggested brewing a baltic porter (I'd credit you but I can't search that far back - it may well have been David Bishop). Given that I'm not in a position to do a cold ferment with the equipment I have, I couldn't do a true BP, but I liked the idea of doing a stronger-the-average porter with a traditional ale yeast. Knowing that Jess isn't a huge fan of really robust, roasty flavours (which is kind of important in a porter), and after the relative success of flavouring my first brew by using coffee beans in the secondary, I started looking on homebrew forums for shared recipes for flavoured porters. For some reason, cherries are really popular with American homebrewers (I guess it must be sort of Black Foresty but I can't say it appeals that much to me), along with chillies, ginger and even cinnamon sticks. One of the most popular recipes of all was for a 'Bourbon Vanilla Imperial Porter', originally devised by Oregon homebrewer Denny Conn - and I used this as the basis for this brew. There's a cracking Q&A with Denny that mentions the formulation of this recipe here.

Denny's recipe - or at least the iteration I saw, as it's been passed around, Chinese-whisper style, quite a bit I think - is pretty decadent. It's heavy on the sweeter malts (approx 7.5% Crystal, 7.5% Brown Malt, just under 6.5% Chocolate Malt...) and specifies adding two whole vanilla beans when racking to secondary. As per the name, he also includes some bourbon at bottling, while some recipes I've seen add oak along with the vanilla beans, but I wanted to keep the number of variables down so omitted them from my version. I also tweaked the proportions of the malts ever so slightly as the original recipe was given in imperial and I didn't want to end up with lots of open bags of the malts I was buying specially for this recipe.

Malt bill:
6kg Maris Otter
1.25kg Munich
750g Brown Malt
500g 'Dark' Crystal Malt
500g Chocolate Malt
300g 'Regular' Crystal Malt


Mash profile was a simple single infusion (to keep it simple) at 68°C, with tap water treated with a couple of Campden tablets - with the amount of grain in the tun and with the way we mashed in by pouring water onto the grain, I found it very hard to avoid balls of dry dough, even after stirring relentlessly. I need to work on my efficiency! Sparged with more of the same to collect just over 23l of wort at 1.066 - a satisfyingly straightforward mash-and-sparge compared to a couple of the gummy nightmares I've had.

As per Denny's original recipe, I used Magnum to bitter (28g, first wort) and then 28g of East Kent Goldings when the IC and Irish Moss went in with 15 mins to go. (At this point I didn't have a hose connector sorted for the IC, so myself and my brother took it in turns to freeze our hands by trying to clamp the end of the hose over the cold tap for the hour it took to get down to pitching temperature - I don't recommend the experience.) As you can see, gravity at pitching was 1.074 - 5 points short of target, but better than I'd feared given the dry, doughy mess the tun had been.

Wyeast 1056 was pitched (with a 1.5l starter), and it was kept more-or-less at 22°C, using the ultra-high-tech towel-and-clothes-pegs temperature control method, for 10 days, by which time it was down to 1.022 - again, a few points short of the target, but the yeast had had enough, leaving it at 6.8% ABV (on the weaker side of imperial - perhaps dynasterial?). My theory on the lower attenuation is that there were some colder spots in the mash tun around the doughy clumps, hence a less fermentable wort - any suggestions welcome.

Two big, fat Madagascan vanilla beans were halved and scraped into the secondary at racking, then the shells quartered and thrown in as well. In hindsight we should probably have sterilised them in vodka but no harm done. Another 10 days on and there was a good, strong vanilla aroma and flavour, which really helps to bring out the chocolate and smooths off the roastiness.

The big problem came when bottling - I hadn't really worked out how to prime correctly at this point, and rather than making a solution and mixing it in, I added approximately 4-5g of sugar to each 330ml bottle. Clearly this is far, far too much for a porter - perhaps as much as three times as much as needed - and the result is that while the first bottles that I tried after only a week had the right volume of gas in them, as time has gone on the carbonation has gotten a bit out of hand. I haven't had any bottle bombs yet, thankfully, but I have had to pour them out and let them settle.

Six months on from the brew day, at Adam and Jess's wedding, I cracked some open for our friends to try, and - once the fizz had subsided - I'm really happy with it. The vanilla has settled back to a background note (but hasn't disappeared altogether), and the main body of the body is rich and caramelly. More importantly, the woman herself seemed to like it, which was the whole point in the first place, so I'm happy. I'm planning to brew this again at some point... although clearly I'll need a new name now that she's married.

Sunday, 17 June 2012

AG Brews #8 and #12 - Red Bee (An Irish Red Ale with Honey)

This beer started out as a name - 'Red Bee', as it's the place where I work and I wanted to brew something for my colleagues - and it was only after I started to look up recipes for an Irish Red that I realised that it wasn't so far fetched to brew a beer in that style with some honey to dry it out a bit in the finish (hence the 'bee' element!).

I have to give full credit for this to MysticMead, whose Raging Red Honey Ale was the basis for this. From reading his blog, his recipe has done him good service, including winning a few homebrew competitions, so it seemed like it would be worth a try. (His blog has some great stuff on it besides this recipe, including hop growing tips, so give it a look!)

I made a couple of changes to the hops to put my own spin on it. His recipe calls for Crystal and Cascade - I didn't have Crystal, so used Mt Hood instead. And to make a change from Cascade, which I've used in all the IPA batches I'd done so far, I swapped them for some juicier, fruitier Galaxy hops that I had in the freezer - I thought they'd suit the malty profile of the style.

Finally, I didn't have any WLP001, which he uses, but I did have Wyeast 1056, which is pretty much the same strain (I'd quite like to give this a try with a more English/Irish strain in future). No starter for this, as it's relatively low gravity.

Recipe - Red Bee (based on Mystic Home Brew's Raging Red)
Mash:
3kg Pale Malt
500g Cara Aroma Malt
250g Carapils
250g Melanoidin Malt

Mash at 66C for 60 mins using campden-treated tap water. Mashout for 5 mins at 72C, then sparged with water from the boiler at about 70-72C. Collected 23l (can't find my pre-boil gravity figure though, which is annoying)

Boil:
28g Mt Hood (5.7%) at 60 mins
28g Galaxy (15%) at 15 mins
10g Irish Moss at 15 mins
454g wildflower honey (made a bit more liquid with about 50ml boiling water) at flameout

Specific Gravity - 1.052
Approx volume - 20.5 litres (this translated into 39 500ml bottles)
ABV 5.78%

This was one of the easiest brewdays I've ever had - simple mash, simple boil, no starter to worry about - and one of the most satisfying. Eight days of fermentation at room temperature (19C) and it was down to 1.008 with no fuss. I was a bit concerned when the bottles took about 3 weeks to carb up, but they were worth the wait. It really looks the part - amazing, deep-red colour with a good white head - and with a deep malt flavour that finishes a little dry (from the honey). It's very sessionable, although I wouldn't recommend it given the strength.

As per the title, I've today brewed this for a second time due to demand from people I've given bottles to - the only change second time around was to first wort hop the Mt Hood, as in the original recipe. Just as before, it was a pleasure to brew - very straightforward, and I managed to hit my SG again (although thanks to some improvements in efficiency I managed to collect a bit more wort this time, so I've got a full 23l in the FV). If it turns out as well as the first batch, I'll be chuffed.

Tuesday, 1 May 2012

All-Grain Brew #2 - Charlie Brown (a big IPA)

As per previous posts, I love IPAs, especially if they're loaded with big, piney American hops. For my second all-grain brew, I wanted to try to do something in that vein - and to banish the memory of the extract brew ruined by over-sanitation. The starting point for this was the evocative IPAs being created by Evin O'Riordan and company at The Kernel, which I find fascinating for being both extreme in their hop flavour but also, perversely, quite malty and rich to provide the right balance. I'd also been reading a bit about decoction mashing, and how Bavarian brewers use multiple steps to create a malty flavour through the production of melanoidins. I had no idea how I'd accomplish multi-step mashing on my equipment, but I did come across melanoidin malt while looking for ingredients - a modified malt designed to produced those melanoidin flavours in a single infusion mash. Ideal for the lazy brewer (or one out of his depth).

So the recipe came together as follows - keep everything simple, with pale malt as the majority of the bill and a little melanoidin malt for flavour and colour. I wanted to use the melanoidin malt very generously - firstly, so I could taste its effect on the malt bill clearly, but also because I wanted to load up on hops and didn't want to be disappointed that I'd created an astringent monster that no-one else I knew would want to drink. I settled on 6kg of Pale Malt and a kilo of melanoidin - a huge percentage (a shade under 15%), and right on the maximum of what I'd seen recommended online. I knew it would make the beer quire brown, but it turned out slightly darker than expected - a, er, brown IPA.

The mash was very painless - I managed to retain 68 degrees throughout, and the lautering was much, much easier than with the breakfast stout I made for AG#1. My notes aren't great for this brew, but I recorded that I collected 14l from the first runnings, and sparged with 10l to collect 21l. In hindsight, I should have collected more - I didn't take hydrometer readings towards the end to make sure I wasn't oversparging, a habit I keep repeating - but I'll come back to this later.

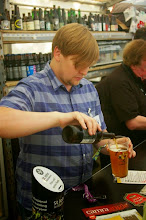
For the hops, I definitely wanted to use Citra hops, the star of my favourite Kernel beer (the Citra IPA), but I only had 100g of these, and as I wanted to use most of them late, I used some Cascade both for bittering and to use the grapefruity flavour to complement the lighter, tropical character that I associate with the Citra. Given that it was very much trial and error at this point, I didn't want to introduce a lot of variables, and I'm glad I didn't. For the yeast, I used Wyeast's version of the California Ale yeast I've used before, Wyeast 1056, so the malt and hop flavour would be unencumbered by anything unusual from the yeast. As I don't have any brewing software, all this was worked out using Hopville, an online brewing calculator... it's not very sophisticated, but it helped give me an idea of what I was doing. This is my brewsheet...

Charlie Brown IPA

Mash:
6kg (86%) Pale Malt
1kg (14%) Melanoidin Malt

Single infusion - Mash at 68C for 60 mins

Hops:
50g Cascade (7%) @ 60mins
25g Citra (15%) @ 30mins
25g Citra (15%) @ 15mins
50g Citra (15%) @ 5mins
50g Cascase (7%) dry hop for 10 days

Other:
15g Irish Moss @ 15mins

OG came out at 1074 - which according to Hopville puts my efficiency at 67%, which I'm pretty happy with at this stage. You remember I only collected about 21 litres? That was a mistake - once I'd drained the wort through the 150g of hop flowers in the bottom of the boiler, I estimate that I'd lost about 3-4 litres to the hops and the boil. The yeast was pitched at 24C, and held at 22C (using a heatpad due to the cold of early February), and bottomed out at 1022 after 14 days, giving an ABV of 6.8%. I had been expecting this to go lower, but it didn't seem high enough to be properly 'stuck'... Any thoughts welcomed! To be honest, 6.8% seemed strong enough anyway.

The remaining 50g of Cascade from the 100g packet I'd broken into were used as dry hops for 10 days in a secondary - more losses there, as the hop flowers sucked up another couple of litres. In all, I only got 25 half-litre bottles out of the batch - not a great return on all that time and effort...! Something to bear in mind for next time.

Cracking the first one after a couple of weeks conditioning, the hop aroma and flavour came through beautifully. The maltiness was a lot bigger than I expected, almost like honeycomb, but with the fresh hop flavour it seemed to just about balance out. That was back in February - more than two months on, I've just cracked open the last of them that I'd been saving, and the difference seems really clear already. The hops have died back a lot, leaving an oddly sweet centre that remind me a bit like a slice of malt loaf spread with Oxford marmalade. I can understand now why everything I'd read about melanoidin malt suggested that it should be used sparingly. It's still quite drinkable, but it's nowhere near the Kernel IPAs I was aiming at. I'm already planning my next attempt...

PS
Just as an addendum, I brewed this immediately for my third brew, I wanted to see if I could recreate this exactly, seeing as I was so disappointed with the volume and wanted some more bottles of the same beer. I followed the notes I had for this almost exactly, taking the same quantities from the lautering and into the boil, and using the same hop additions. However, during the cooling process - disaster. I left the room while the immersion chiller coil was running, and came back to find the boiler almost overflowing - a leaky crimp between the hose and the copper had caused an extra 3-4 litres of cold water to seep into the wort. I was tempted to pour the batch away, but pitched anyway - this batch ended up down at 1008, but with no idea of the OG, I can't really make any notes on what happened here. In this version, the melanoidin malt seems even more pronounced, sweet and caramelly and off-putting. The hops are distant, and it just doesn't work. Ironically, because of the leak into the wort, I have much, much more of this beer than I'd want... The home brewer will never have enough of the beers that they want to drink more of, but will always have a surfeit of those that are less successful.

Tuesday, 10 April 2012

All-Grain Brew #1 – Black Rain (A Botched Breakfast Stout)

Back in January, I bought a mash tun. I hadn’t actually managed to brew an extract beer I was truly happy with yet, so it was a mixture of naivety and excess ambition. Like a lot of home mash tuns, mine started life as a cool box and has been ‘enhanced’ with a stainless steel ‘false bottom’, which protects a small length of hose that leads to a ball-joint tap. I would love to say that I constructed this myself but, after reading lots of guides that made it sound really easy, I could see myself accidentally ruining the coolbox and having to buy another… The Home Brew Shop in Aldershot converts coolboxes in-house, and I’m pretty happy with the job they’ve done.

Going back to the naivety and excess ambition… the sensible thing to do when using new equipment for the first time would have been to brew something straightforward, with as few variables as possible. 3kg of pale malt, a single hop addition, no drama. However, it was the middle of winter and I wanted to brew the kind of thing I loved, so I decided to have a go at doing an oatmeal stout. I’d been having a bit of beer banter on Twitter with a musician friend who loves coffee (he travels with an espresso machine wherever he goes), so I decided to do a breakfast stout that was luscious and thick from the oats, but with a big coffee kick to it. I thought it would be a bit less disheartening to mess up a complicated first AG brew than if I ruined another really simple brew.

So, with that justification out of the way, I needed a recipe. I initially started looking for a clone of Mikkeller’s Beer Geek Breakfast – which I love – and stumbled on a recipe for Founder’s Breakfast Stout, which I’ve never tried. In addition to the coffee, they add unsweetened chocolate baking nibs and dark chocolate – the recipe is here on the BYO Magazine website. It sounded pretty good, so that was my starting point. I dutifully went out and bought what I thought were the right ingredients – as I couldn’t find ‘unsweetened chocolate baking nibs’ (which I assume are a US-only sort of thing), I replaced them with some grated 100% cacao that I found in Waitrose.

When it came to assembling the malt bill, I realized something wasn’t right – I only had 3kg of Maris Otter to the 6kg I needed. If it had been one of the speciality grains, it wouldn’t have been the end of the world, but suddenly this big stout was looking a lot more diminutive. In a bit of a panic, I threw together every bit of malt or fermentable that I could find that wouldn't affect the colour or roasted flavour too much:

-       1kg Golden Promise that I’d accidentally bought in place of Crystal Malt when doing Brew 3
-       300g Crystal Malt (the remnants of the bag that went into the initial bill)
-       500g light dried malt extract
-       400g flaked oats (again, the remnants of the bag that went into the initial grain bill)

The first mash-in for the new tun


I resisted the temptation to add any sugar as I didn’t want to thin the end beer out too much. I also realized later that the recipe required special, debittered black malt (e.g. Carafa Special III), whereas I used standard black malt through pure ignorance.

So, here’s the actual recipe:

Mash:
3kg Maris Otter
1kg Golden Promise
1kg Jumbo Oats
500g Crystal Malt 60L
450g Chocolate Malt
340g Roasted Barley
250g Black Malt (NOT Carafa Special III)

Boil:
500g Light Dried Malt Extract @ First wort
35g Nugget hops (12% AA) @ 60mins
13g Willamette hops (5.5% AA) @ 30mins
13g Willamette hops (5.5% AA) @ 0mins
1 dessertspoon Irish Moss @ 15mins
55g Sumatran Mandheling coffee beans (fine ground) @ 0mins
70g Green & Blacks Organic Dark Cook’s Chocolate @ 0mins
43g Willie’s Supreme Venezuelan Black 100% Cacao @ 0mins

1 vial California Labs WLP001 (California Ale)
50g Sumatran Mandheling coffee beans (coarse ground) – 7 days in secondary

The sparging set-up


The set-up was a classic three-tier – boiler at top acting as a hot liquor tun, mash tun in the middle, fermenter at the bottom to collect wort, which is then poured back into the (empty) boiler when full. 15 litres of strike water went into the grist at 75, giving a mash temp of 65, which held firm for an hour (I was prepared for a loss of a degree or two, so was pleasantly surprised). I had been aiming for 68, but didn’t think I’d lose a full 10 degrees to the grain – more naivety! In addition, the mash was probably a shade too thick - there were a couple of stuck sparges along the way (solved by blowing into the tap.


The hop additions were straight-forward – 35g Nugget on 60 mins, 13g of Willamette on 30 and 0 mins. The chocolate, cacao and coffee went in right on flameout as well, and turned the dark wort absolutely jet black – just the colour I wanted. The biggest downside to using the coffee like this was that it immediately clogged up the tap on the boiler – getting the wort from boiler to fermenter took a very, very long time, as the tap kept jamming with coffee grounds. (getting the coffee out of the tap afterwards was nigh-on impossible – tell-tale coffee grounds appeared from nowhere when I was heating the strike water for the next brew!)
Clockwise from top left, all my boil additions - a mix of cacao, chocolate and ground coffee; Irish Moss; a vial of WLP001; Willamette; Nugget; and more Willamette to finish!

The OG ended up at 1.068 – below where it should have been if the recipe had been followed (1.078 is specified in that recipe), but not disastrous – and as I didn’t make a yeast starter and simply pitched a vial of WLP001 into the wort, it’s probably just as well. I was a bit worried when the yeast gushed out of the vial on opening, but apparently this can be a good sign – and there were no ill effects in the finished beer. The primary ferment was at about 20-22 degrees – and that was with the help of a heat mat that my parents use for their wine fermenting, and was down to 1.028 within three days and finished up at 1.022. ABV a shade over 6% - less than I’d been hoping for, but not bad considering the farce with the grain.

Wort draining into the FV - fantastic colour!

I racked it onto 2 more ounces of coarsely ground Sumatran coffee beans and left it to picked up their flavour for 7 days. Then, as I fancied oak-ageing some of it, I split the batch into two, bottled half of it and racked the other half into carboys containing oak chips that had been soaking in Jack Daniels for a few days – I’ll blog about how the oaking worked out later.

It went into bottles before the SF trip in February and I resisted the temptation to open any until the start of March. The colour is perfect – dark black, with a tan head, although it doesn’t stick around for very long (due to the coffee oils?). The body is a bit disappointing – I was hoping it would be feel a bit thicker with all those oats in there, although I’ve since read about using glucan rests with oats, which I need to read up on. The coffee and chocolate flavour are spot on though, and getting better as it matures – it’s a shame that it doesn’t have a bit more booze to back them up, but that’s my own fault. A bit more sweetness might help too, which could be achieved either by changing the mash temperature or adding a little lactose to the boil. I'm very happy with it though, overall - a huge leap ahead of the extract brews, despite the numerous basic errors.

I’ve christened the beer Black Rain, after one of the aforementioned coffee-loving musician’s songs – I’ve given him, Mel and a few other friends some bottles, so am looking forward to getting some feedback. If anyone reading this would like to do a swap, please let me know! I’m hoping to brew another batch of this in the coming weeks that puts right some of the problems mentioned above - Item 1: Make sure you have the right grain bill before you start.

Wednesday, 14 March 2012

First Steps in Brewing


Before I started writing about my all-grain brews, I wanted to write a bit about how I started out. At the time it seemed really easy to get started, but then none of the first few batches turned out exactly as I wanted them to, which says something. I started brewing beer towards the end of 2011 – it’s something I’d wanted to do for a long time but never had the impetus to start. I was lucky enough to have parents that have made beer, cider and wine intermittently throughout my childhood, so they had fermenters, airlocks and hydrometers knocking around. As a hugely impatient novice, I had the idea that I could flick through John Palmer’s How to Brew, buy some ingredients, and suddenly be turning out decent brews. As I said – an impatient, naïve novice. The hardest bit for me to get my head around was the cleanliness. Everything needs sterilizing – fermenters, equipment, surfaces… but not too much, as any trace of the chemicals you’ve used will do as much damage to the brew as if you’d not bothered at all. A thin sodium hypochlorite solution does not taste good – but more of that later.

The first brew was a beer kit called Citrus Blast, put together by Pop’s Home Brew in Cheltenham. It seemed a bit too easy – you got some dried yeast, two cans of Coopers LME and a couple of different hop additions, each in their own bags. Boil them up with as much water as you can fit in as big a pot as you can get your hands on, then after an hour tip it into the fermenter, top up with cold water (which helps bring the temperature down to 20C), then pitch some rehydrated Nottingham yeast. What we had after fermentation was recognizably beer – deep brown, bit of malt, a bit of classic English hops… it just wasn’t the sort of stuff I like to drink.

Brew Two was another kit, which should have come out as a 5% stout, and consisted of a single hop bag and two cans of Coopers Dark extract. I had the bright idea of cutting the overall volume to under 4 gallons instead of 5 in order to bump up the original gravity to 1.080 or something silly and therefore, in theory, the eventual ABV. No taking into account the yeast (it was the same dried Nottingham yeast) or the amount of unfermentables in the Dark Malt Extract or anything – I told you I was naive. It eventually bottomed out at something like 1.028, looked and smelled like Marmite and tasted like, well, diluted Dark Malt Extract. Thinking it was a write-off, we decided to play around with it a bit – splitting it into four one-gallon demi-johns and putting some coffee beans into one, bourbon-soaked oak chips into another, both oak and coffee into a third and leaving the fourth gallon untouched. I’d read online about using coffee and oak to flavour stouts in the secondary, and given that our extract beast seemed to be a bit of a mess, I thought it would be an opportunity to try it out. We gave them all a week, then bottled then. Incredibly, they turned out okay – they were clearly not going to win any brewing awards, but the coffee and oak came through in the various bottles to take the edge off the twang. I’m planning to leave a few bottles for six months and see if they’ve improved.

At Christmas time I was given a 5-gallon boiler, an immersion chiller and some other new equipment, and decided to make Brew Three a recipe of my own. I adapted a recipe online for an Imperial IPA, and,ordered three cans of light malt extract, some US hops (Apollo and Chinook) and a vial of White Labs WLP001 California Yeast. The boil seemed to have gone well, the OG was up at 1.070 where it should have been, and the hops smelled great. Seven days later, it was down to 1.018 - despite me not making a starter, firstly because I didn't know exactly how and secondly because I hoped the yeast would pull through). We racked it to the secondary for dry-hopping with more of the Chinook hops and left it to settle. However, when we came back to it in the following days, there was an odd smell to it – instead of the crisp hop aroma, there was a slight chlorine taint to it that got worse when I tasted a sample. My theory is that there must have been some undissolved crystals of the sodium hypochlorite in the bottom of the secondary that we hadn’t rinsed out properly. The whole batch was ruined (although having said that, my brother couldn’t really taste it, so drank every bottle over the course of a fortnight…)

The lessons I learned from the first few batches were:
  1. -       Keep everything sanitised... but rinse everything before use to make sure there's no residue.
  2. -       Don’t mess around too much unless you know what you’re doing. If you do have to start messing around, make copious notes. 
  3. -       Record everything… starting temps, OGs, FGs, everything.
  4. -       Don’t be too ambitious to start with.
  5. -       Read and learn as much as possible - the Palmer book is highly recommended.
  6. -       Until you know what you’re doing, expect to make fairly mediocre beer at best
      That's not to imply I'm any kind of expert now, but I'm definitely cringing a bit at remembering some of the stuff I've just written....

Wednesday, 7 March 2012

Kona


I’m looking forward to trying a bottle of my first all-grain beer batch, a coffee stout called Black Rain, which I brewed back in January. I’ll blog about that my fully when I do, but one of the big challenges I faced was trying to source the right coffee beans to put in the secondary. I wanted to copy the coffee aroma of Founders’ Breakfast Stout, but despite finding a recipe online and going to every supermarket or coffee vendor around Cheltenham, we couldn’t find what they use – Kona coffee. (In the end, we used some Guatemalan beans instead.)

Kona’s coffee is hugely prized – the conditions on the volcanic western slopes of Hawaii’s Big Island are perfect for growing it, and apparently it can fetch more than £50 a lb. (I made sure to pick up a couple of pounds for the next batches of coffee stout – much cheaper than that, I assure you). Somewhat less prized are the beers of their local microbrewery, the Kona Brewing Company, which is based a few hundred yards from the sea in Kailua-Kona. I’d seen their beers on the shelves of Whole Foods in San Fran, but not tried any of them, so was immediately curious. Although the beer element of our trip was ostensibly over, I can’t resist the lure of a brewery tour, especially if there’s an adjoining brewpub.


Kona Brewing Company's compact setup, which only produces draft beer
Given the hot and humid year-round climate in Kona, the majority of KBC’s brews fit into the pale, designed-to-be-served-ice-cold mould – they have a stock lager, the grassy, gassy Longboard; a pale ale, Fire Rock; and a slightly paler ale, which was on draught only and whose name escapes me (it may be the Duke's Blonde). I wasn’t too impressed by these – bland and anaemic, they may have been microbrewed but they didn’t taste particularly individual. At the end of the tour, we got to try a sample of Even their Hefeweizen, Hula, was strangely muted – lots of fruity, banana twang, but very one-note, with no real depth or complexity.

Kona's Longboard Lager - the colour of varnished pine but without the flavour

The Lavaman Red comes across like a pint of English premium bitter that’s been chilled to freezing point and then carbonated to within an inch of its life (They have a cask-conditioned night every other Friday, and perhaps this might be better served that way). Their IPA was better – a passion fruit bomb on the nose, although it was a bit too dry in the finish. Our tour guide, an ebullient man called Jesse, wouldn’t divulge the hop bill of as ‘we don’t give away our recipes’ – although this may be news to the brewers, who put all the info for each beer on their website. So the hops in the IPA are Northern Brewer, Cascade and Centennial – just don’t tell Jesse. The best of the pale beers is Wailua Wheat, a wit brewed with passion fruit juice. You get the fruit flavour straight away, but then it fades into the body of the beer to become a refreshing note rather than dominating.

Their most successful beers are their darker or more experimental beers. Pipeline Porter, which takes their stock porter, Black Sand, and ages it on the aforementioned Kona coffee, was fantastic – a really rich coffee aroma, but only a hint of coffee in the flavour, with the caramel malt flavour dominating. Their other coffee beer, a stout called Da Kine Grind, was even better – bumping up the strength to 8.5% and pouring engine-black. The most impressive thing for me was the rich, creamy head – something you don’t usually see with coffee beers due to the oil in the coffee killing the head retention. I didn’t see it poured, so perhaps there’s some special technique at play. We stuck to these for our time on the island – the Pipeline Porter was so good that we took a growler of it away.

My 64oz Kona growler alongside some of their Pipeline Porter

Pipeline was one of the beers we’d seen in Whole Foods, and again in some of the local liquor stores on the island, so it might have made more sense to buy bottles. However, the two beers are not necessarily one and the same. While the beer we’d been drinking in the brewpub – and that’s supplied to Kona’s other bars and restaurants – is brewed on site in Kona, all their bottled beer is contract brewed by the Craft Beer Alliance at an industrial facility in Oregon. While Jesse was quick to point out on the tour that this was just a question of size, and that this practice is commonplace, but it made me feel uneasy – I’ve read of UK brewers having one particularly popular core beer contract-brewed to meet demand, usually while they are trying to expand their own brewing facilities, but the Kona setup means that their brewers never touch any of the beer that is distributed nationwide – only that which is drunk in Hawaii. And there’s no indication on any of their bottle labels that the beers, which trade heavily on their island heritage, have actually been crafted on the mainland. Perhaps I am being too naïve here.

If you’re lucky enough to visit Kona, I do recommend taking the tour and trying their beers for yourself. The adjoining brewpub does fantastic food – using some of the dried, spent grain from the mash tun to make pizza dough and bread, which I thought was quite cool. For the moment though, I don’t think coffee is under threat as the most famous drink from Kona.